
Ram Jeep Dodge Chrysler Factory Radio Add A Subwoofer Amp Plug & Play Harness
Want to add a subwoofer to your original stereo?
Don’t want or know how to cut into your wiring?
Take the wiring guesswork out of the installation with this plug and play wire harness! Installation is as easy as 1, 2, 3!
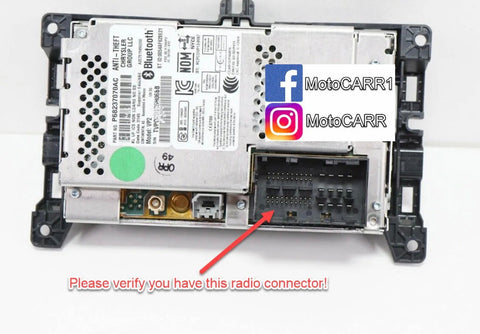
- Remove your OEM factory radio
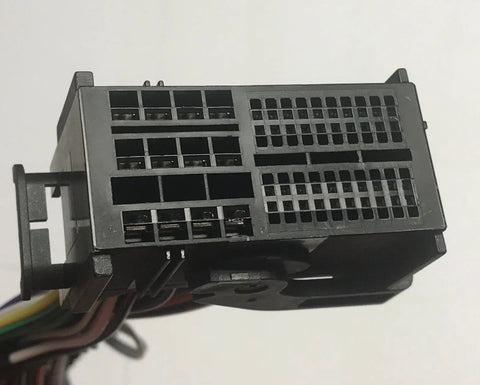
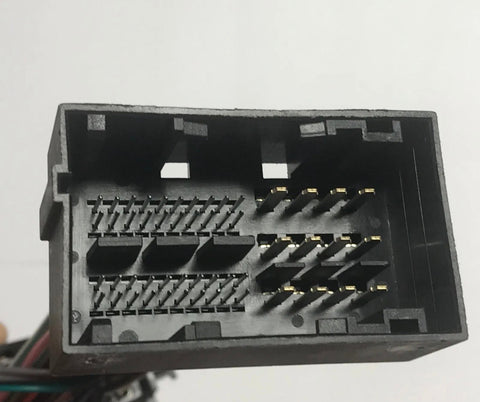
- Unplug the OEM factory wiring and plug in this wire harness
- Reinstall your OEM factory radio
What is it?
This 2 Channel LOC (Line Output Converter) is for adding an amplifier for speakers or a subwoofer. The harness has a gain adjustment for adjusting the output level, however we also have listings for this harness with a bass knob so output can be adjusted after it has been installed.
Interface Features
- Designed to provide (2) channels of low-level audio output from the factory system.
- Allows for the installation of an amplifier for speakers or subwoofers.
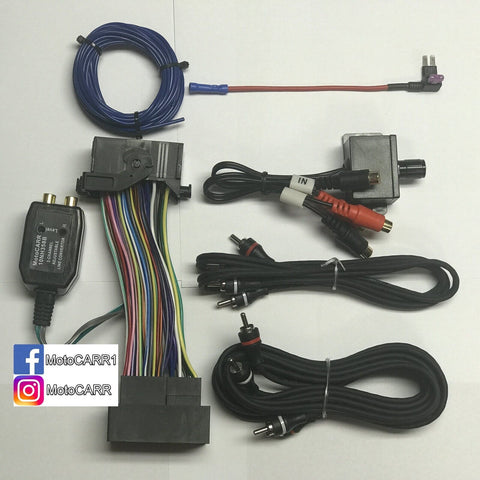
Interface Components
- MotoCARR Wiring Harness
- Add a circuit fuse tap with 3A fuse
- 15ft amp remote turn on wire
- One (1) 3ft RCA cable
- One (1) 10ft RCA cable
- One (1) Bass knob
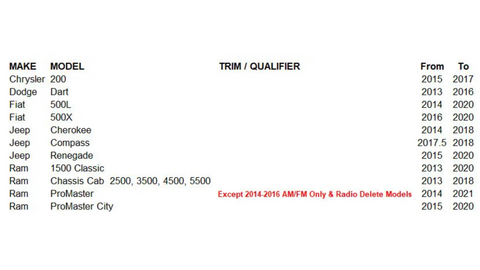
APPLICATIONS
CHRYSLER
- 200 2015-2017
- Pacifica 2017-2020
DODGE
- Dart 2011-2014
- Durango 2011-2020
- 1500, 2500, 3500 2013-Up
Fiat
- 500 2016-2019
- 500L 2014-2020
- 500X 2016-Up
Jeep
- Cherokee 2013-Up
- Compass 2017-Up
- Renegade 2015-Up
Ram
- Chassis Cab 2500/3500/4500/5500 2013-Up
- Promaster 1500/2500/3500 2014-Up
- Promaster City 2015-Up
Converter adjustment instructions:
- After completing all of the necessary connections, turn the adjustment pots all of the way down by rotating them completely counter-clockwise.
- Turn the stereo system on and adjust the main volume control on the stereo to approximately 3/4 maximum volume.
- Select one of the adjustment pots and turn it slowly clockwise until you notice audio distortion and then stop.
- Turn the remaining pot to the same position as the previously adjusted pot.