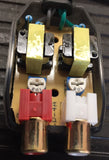
Honda Acura Factory Radio Add A Subwoofer Amplifier Plug & Play Wire Harness
Want to add a subwoofer to your original stereo?
Don’t want or know how to cut into your wiring?
Take the wiring guess work out of the installation with this plug and play wire harness! Installation is as easy as 1, 2, 3!
1. Remove your OEM factory radio
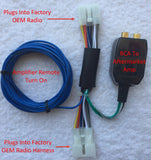
2. Unplug the OEM factory wiring and plug in this wire harness
3. Reinstall your OEM factory radio
What is it?
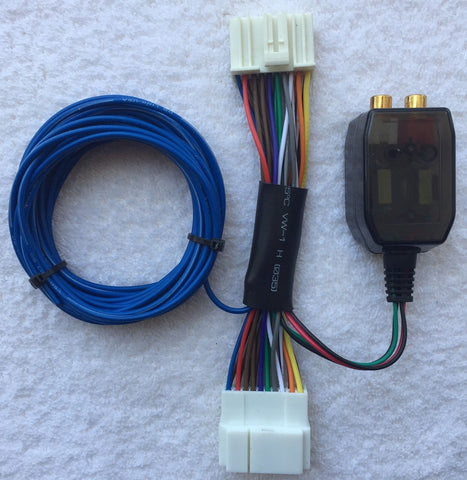
This wire harness provides a connection for one set of RCA cables to provide an audio signal to an external amplifier. Also pre-installed on the harness is a remote amplifier turn on wire. This wire, along with a set of RCA cables, is run to your aftermarket amplifier. All that’s left for you to do is connect the main power wire from your battery and ground. (Not included)
What you will receive:
· One (1) plug and play wire harness
Compatibility Notes:
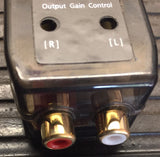
• Audio volume to the amplifier can be adjusted by the dials on the harness. For easier access we recommend using an external volume knob.(Not included but we can provide one)
• We use a variety of wire colors for the remote wire. Regardless of color, rest assured it is for the remote turn on of an amplifier.
• Certain applications benefit from a bass knob to control subwoofer volume independent from the radio as volume is adjusted post amplification.
Compatibility
| Make | MODEL | FROM | TO |
| Acura | CL | 2001 | 2003 |
| Acura | MDX | 2005 | 2006 |
| Acura | MDX | 2001 | 2004 |
| Acura | NSX | 2005 | 2005 |
| Acura | RSX | 2002 | 2006 |
| Acura | RL (without nav) | 1999 | 2003 |
| Acura | TL | 2007 | 2008 |
| Acura | TL | 2004 | 2006 |
| Acura | TL | 1999 | 2003 |
| Acura | TSX | 2004 | 2008 |
| Honda | Accord | 2003 | 2007 |
| Honda | Accord (lower dash) | 2003 | 2007 |
| Honda | Accord | 1998 | 2002 |
| Honda | Civic (DX, excluding Canada) (with gray dash) | 2006 | 2011 |
| Honda | Civic (DX, excluding Canada) (with taupe dash) | 2006 | 2011 |
| Honda | Civic (Special Edition) | 2005 | 2005 |
| Honda | Civic (excluding SI and SE models) | 2001 | 2005 |
| Honda | Civic Si (3-door only) | 2002 | 2005 |
| Honda | Civic | 1999 | 2000 |
| Honda | CR-V | 2002 | 2006 |
| Honda | CR-V | 1999 | 2001 |
| Honda | Element (all but LX) | 2005 | 2011 |
| Honda | Element (LX) | 2005 | 2011 |
| Honda | Element | 2003 | 2004 |
| Honda | Insight | 2001 | 2006 |
| Honda | Odyssey | 2005 | 2007 |
| Honda | Odyssey (with nav) | 1999 | 2004 |
| Honda | Odyssey (without nav) | 1999 | 2004 |
| Honda | Pilot (with nav) | 2006 | 2008 |
| Honda | Pilot (without nav) | 2006 | 2008 |
| Honda | Pilot | 2003 | 2005 |
| Honda | Prelude | 1999 | 2001 |
| Honda | Ridgeline | 2005 | 2008 |
| Honda | S2000 | 2000 | 2009 |
| Isuzu | Oasis | 1999 | 1999 |
| Suzuki | Aerio | 2005 | 2007 |
| Suzuki | Aerio Sedan | 2003 | 2004 |
| Suzuki | Aerio 5-door | 2003 | 2004 |
| Suzuki | Aerio Sedan | 2002 | 2002 |
| Suzuki | Aerio 5-door | 2002 | 2002 |
| Suzuki | Grand Vitara | 2006 | 2011 |
| Suzuki | Grand Vitara | 2003 | 2005 |
| Suzuki | Kizashi | 2010 | 2013 |
| Suzuki | SX4 | 2007 | 2013 |
| Suzuki | XL-7 | 2003 | 2006 |
Converter adjustment instructions:
- After completing all of the necessary connections, turn the adjustment pots all of the way down by rotating them completely counter-clockwise.
- Turn the stereo system on and adjust the main volume control on the stereo to approximately 3/4 maximum volume.
- Select one of the adjustment pots and turn it slowly clockwise until you notice audio distortion and then stop.
- Turn the remaining pot to the same position as the previously adjusted pot.

